Cracking the Case: A Forensic DNA Mystery
This Saturday DNA class was all about solving a crime using real forensic science. I felt like a real investigator as I worked through clues and DNA evidence.
We were told there had been a robbery. Multiple suspects. One crime scene full of clues — and only one way to figure out who did it: science. What followed was a journey through seven stations of evidence, each teaching me something new about how DNA and forensic analysis work together to solve real cases. Here’s what I learned — and why it was way more fun than reading a textbook.
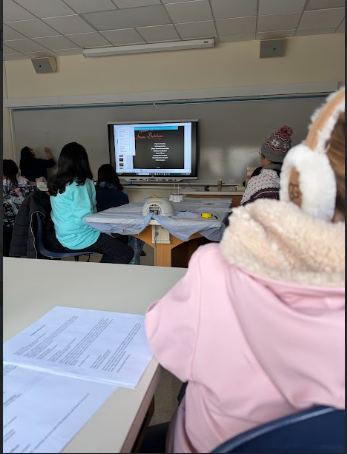
This is Mrs. Johnson explaining forensic science!
What’s the Crime Scene Telling Us?
Our first stop was all about context. At Station 1, we looked at the crime scene setup: what happened, what was taken, and what objects were left behind. It felt like opening a storybook mystery — only this time, the story was real, and the clues were right in front of us.
Understanding the context helped shape all the questions we’d ask later. Where were the footprints? Whose fingerprints were on that object? Why was one item out of place? These weren’t random details; they were pieces of a puzzle waiting to connect.
Fingerprints Don’t Lie (Unlike some Suspects)
Next came the fingerprints — which was way more exciting than I expected. Did you know that fingerprints are so unique that they’re used as one of the first tools in solving mysteries? If you want a simple guide to the basics of fingerprint patterns and why they help identify people, check out this overview on forensic science facts: Forensic Science Facts
At Station 2, we compared evidence prints to those of our suspects. Every ridge and swirl pattern told a tiny story about who might have touched what. This was really hard - at first glance, many of the prints looked the same, and because the lines were so close to each other it was hard to keep my eyes focused for long to identify and find the differences.
In Station 3, we got to see how unique those patterns really are - with small differences in loops and whorls helping to eliminate people from suspicion. It made me appreciate how much detail is in something as simple as a fingertip!
For a fun interactive way to explore how DNA fingerprints are created (through separating DNA fragments), try this interactive resource from PBS:Create a DNA Fingerprint
Math Meets Mystery: Measuring Physical Evidence
Station 4 wasn’t just about biology — it was about math! We took measurements of the prints and impressions, from the scene, to calculate the suspect’s height and arm span.
It sounds simple, but putting those numbers next to our suspects gave us a huge advantage. We narrowed our suspect pool down to just two people by connecting biology and mathematics.
DNA : Ladders & Sequencing
Stations 5 & 6 went full forensic lab on us. DNA ladders, band patterns, actual sequences.
We compared evidence bands using a DNA ladder, which is like a ruler for DNA. Instead of measuring inches or centimeters, it measures DNA fragment sizes. Each “rung” on the ladder is a DNA piece of a known length (size). Scientists use it to compare unknown DNA samples — kind of like comparing heights to a measuring tape. If two samples have bands in the same positions, they match – just like matching heights on a measuring chart.
Six was one of the most detailed stations. We looked at an actual DNA sequence and compared it to the suspects’ DNA sequences. Matching the letters helped confirm whose DNA was present, showing how precise DNA evidence can be.
For those of you interested in learning more, check out:Forensic Science for Kids.
Putting the Pieces Together
At the final station, everything clicked. We had fingerprints, measurements, ladder patterns, and DNA sequences — all pointing to one person. I wrote down my conclusion, explained my reasoning, and — yes — my original guess was right: Jon was the culprit.
It felt incredible to solve a mystery using evidence the way real forensic scientists do. DNA isn’t just a string of letters in a textbook. It’s the key to understanding biological identity, solving crimes, and helping in fields like medicine.
For a quick explanation of how DNA analysis helps solve mysteries, visit PBS Learning Media’s DNA analysis activity:DNA Analysis
The Takeaway
What made this session so much more meaningful to me is the knowledge that I brought with me - with my at home experiments and GLP-1 work for LISEF, I’ve had to learn a lot about DNA and how it works. It was cool knowing some of the things she mentioned without her explaining them - I could answer questions that I already now - it was nice!
If you are looking for something fun and hands on to do over the weekend, register for an upcoming Saturday DNA! session. I will be making an appearance at the March session - Create a Karyotype - as a lab assistant: sign up here https://dnalc.cshl.edu/programs/saturdaydna.html Huge thanks to the Cold Spring Harbor Learning Center for putting this together, and special shoutout to Brittany Johnson for making forensic science come alive. You absolutely nailed it!
Case closed.